Brewhaus Forum
»
General Topics
»
Our Projects
»
Simple Copper Parrot Construction
 Rank: Senior Member Groups: Registered, Moderator
Joined: 4/14/2010(UTC)
Posts: 1,666
Was thanked: 16 time(s) in 16 post(s)
|
I guess if any of my buddies want either of these I'll sell em and make another one. Knowing what I know now it may be a schosh easier. Oh well live and learn.
|
|
|
|
|
|
 Rank: Junior Member Groups: Registered
Joined: 11/10/2012(UTC)
Posts: 85
|
I want to see a pic of ohyeahyeah's parrot for comparison and can't seem to find it anywhere......
|
|
|
|
|
|
Rank: Senior Member Groups: Registered, Moderator
Joined: 4/14/2010(UTC)
Posts: 1,666
Was thanked: 16 time(s) in 16 post(s)
|
I dont remember which thread its in but his is far superior to the junk I built. I was going for the look of his but its not to be.......he'll be along shortly and maybe he will paste it here or guide you to it. Dont be to hard on mine when you see his plz...hehehehe
|
|
|
|
|
|
Rank: Junior Member Groups: Registered
Joined: 11/10/2012(UTC)
Posts: 85
|
I like yours.... I actually liked the first one the best as far as looks. I like the way it was freestanding also.
|
|
|
|
|
|
Rank: Advanced Member Groups: Registered
Joined: 10/12/2012(UTC) Posts: 463   Was thanked: 3 time(s) in 3 post(s)
|
[ATTACH=CONFIG]660[/ATTACH] No matter what they look like they are a handy device. Saw a picture and put this together one afternoon. A little over kill for my Easy Still but I will have a PSII in the spring. Hokey attached the following image(s):  still2.jpg (17kb) downloaded 7 time(s).You cannot view/download attachments. Try to login or register.
|
|
|
|
|
|
Rank: Senior Member Groups: Registered, Moderator
Joined: 4/14/2010(UTC)
Posts: 1,666
Was thanked: 16 time(s) in 16 post(s)
|
Well I should have my fill of parrots now. I hate to fail and so I decided to givera another go with the coil parrot. This time I used 3/4 stock for the upright not sure it matters but I'll find out in a week or so, should have a wash ready to run by then.
|
|
|
|
|
|
Rank: Senior Member Groups: Registered, Moderator
Joined: 4/14/2010(UTC)
Posts: 1,666
Was thanked: 16 time(s) in 16 post(s)
|
"This is what I started with but I made some mods along the way.  "
|
|
|
|
|
|
Rank: Senior Member Groups: Registered, Moderator
Joined: 4/14/2010(UTC)
Posts: 1,666
Was thanked: 16 time(s) in 16 post(s)
|
"WhenI first got it going I used 3/8ths for the beak but I thought it would be a really big hole in the coupling up top so I used 1/4 which I'll show in the next post.  This is just the pieces laying together."
|
|
|
|
|
|
Rank: Senior Member Groups: Registered, Moderator
Joined: 4/14/2010(UTC)
Posts: 1,666
Was thanked: 16 time(s) in 16 post(s)
|
"Here is the final product and its waiting for construction. And everything put together and ready for soldering.   "
|
|
|
|
|
|
Rank: Senior Member Groups: Registered, Moderator
Joined: 4/14/2010(UTC)
Posts: 1,666
Was thanked: 16 time(s) in 16 post(s)
|
"Next this is the final product and its gonna hang from the condenser spout like the other one.   "
|
|
|
|
|
|
Rank: Senior Member Groups: Registered, Moderator
Joined: 4/14/2010(UTC)
Posts: 1,666
Was thanked: 16 time(s) in 16 post(s)
|
"So I guess I should have my fill of parrots now, I'm gonna use the newest one next run but dont know which will be my favorite till then. Anyway just wanted to share and say with a little determenation even I can build one of these so givera go sometime, its not that tough unless you want to coil your own copper and then patience is a must.. hehe  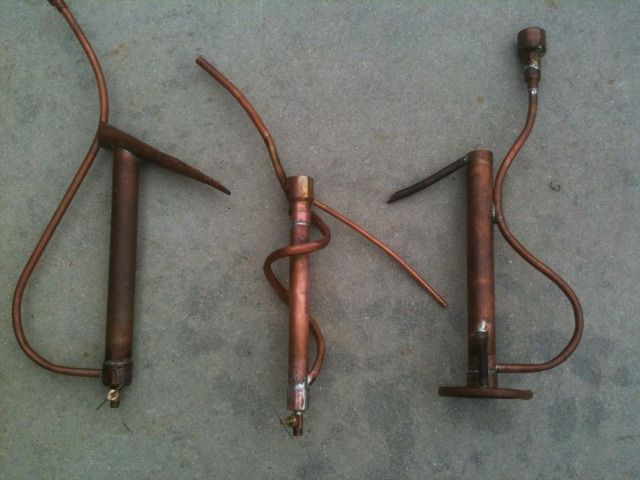 "
|
|
|
|
|
|
Rank: Senior Member Groups: Registered, Moderator
Joined: 4/14/2010(UTC)
Posts: 1,666
Was thanked: 16 time(s) in 16 post(s)
|
"Well I'm putting my newest addition of the collection to work today. Its about 70 degress outside today and its a great day to be stillin. Here she is hanging from the spout of the condenser and doin her job. 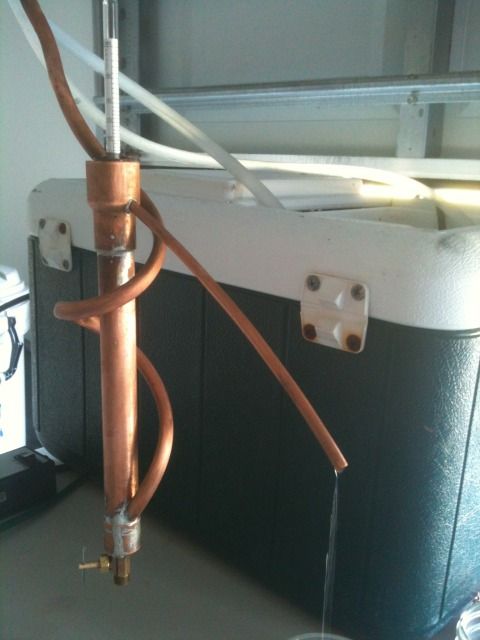 "
|
|
|
|
|
|
Rank: Senior Member Groups: Registered, Moderator
Joined: 4/14/2010(UTC)
Posts: 1,666
Was thanked: 16 time(s) in 16 post(s)
|
"This next pic shows how the --surface tension-- of a liquid pushes the hydrometer up in a holding position if you will. This late into the run I'm only gettin about 150 proof but no worries. I like watching the run develope through the hydrometer and the catchcup idea while not a must does seem to add a little something to the look and functionality of the parrot.  "
|
|
|
|
|
|
Rank: Senior Member Groups: Registered, Moderator
Joined: 4/14/2010(UTC)
Posts: 1,666
Was thanked: 16 time(s) in 16 post(s)
|
"And one last pic that shows my RSC'er and how the plug wire connects to the keg. What you see is a -SS half coupling with NPT thread (national pipe thread) welded to the keg and the element screwed into that coupling and the plug wire just screwed into the element, also the guard you see is what would go around the finished plug end. I push it up there just for safety. Although I like this little guy it seems the others with the 1 inch tube might be alittle mmmmmmmmmm I dont know, more accurate with more liquid inside. This just seems alittle tight. Maybe I'll switch out for another one and see if the proof holds. Oh well still learning. 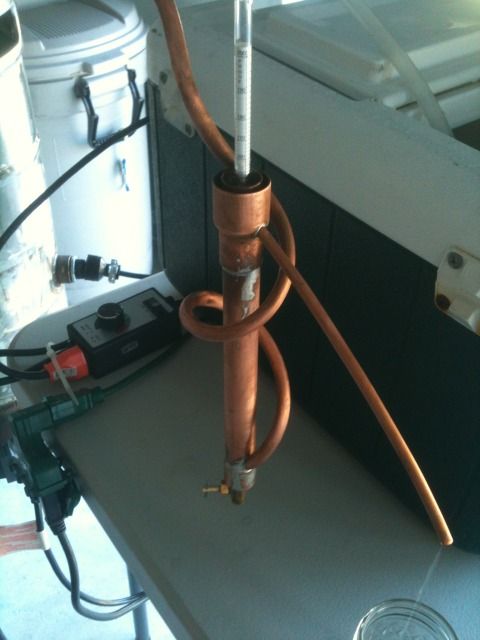 "
|
|
|
|
|
|
Rank: Advanced Member Groups: Registered
Joined: 12/3/2012(UTC)
Posts: 278
|
Did you notice any difference how the meter worked with the 3/4" vs the 1" pipe?
|
|
|
|
|
|
Rank: Senior Member Groups: Registered, Moderator
Joined: 4/14/2010(UTC)
Posts: 1,666
Was thanked: 16 time(s) in 16 post(s)
|
"capt. I think they both read accuratly but I want to make another run just to make sure. I did switch out several times and they both gave the same readings. I guess if you have a hydro on the thinner side it would prolly fit better (in my mind anyway) the one I use seems like a tight fit. I know it worked fine but if the parrot is not level it could bind inside, thats how tight it is in the 3/4"" upright. I felt like I had to continuously adjust and fidget with the parrot just to ease my mind. I guess all you have to do is pay attention but the 1 inch has plenty of room for piece of mind. I think most of the ones you see for sale are the 3/4"" tube and if I would have started with that one it prolly wouldn't make a bit of difference, oh well maybe thats just my OCD kicking. If you decide to try the build you can get everything you need at Lowes or HD for the 3/4"" one. If you go 1"" you'll need to find another source for the 1.25""-1.5"" reducer that is the catchcup. Its not that hard to find the other stuff but the guy at Lowes said they just dont sell the bigger stuff....ebay does though. I'm sure any plumber will sell you a reducer. Once you get it going post some pics, this really is a fun and easy build..if your not interested in building one I'll sell you one of these!!!! "
|
|
|
|
|
|
Rank: Advanced Member Groups: Registered
Joined: 12/3/2012(UTC)
Posts: 278
|
Heeler,
Thanks for the good info, I'm most likely going to give it a go and make one up my self. A friend of mine is a building engineer at a large building and he's going to see if he has some extra copper pipe and fitting's kickin around. If both sizes work the same as far as floating the meter I'll use what ever he can get if anything... I do like the third one best with the catch cup and the valve on the bottom for draining the forshots.
|
|
|
|
|
|
Rank: Senior Member Groups: Registered, Moderator
Joined: 4/14/2010(UTC)
Posts: 1,666
Was thanked: 16 time(s) in 16 post(s)
|
"I saw where someone made a coil that is the discharge tube, so I modified the last parrot I made. Damn its hard to coil copper, I can do a lotta shit but coiling copper is just not one of em....... I thought this would be fun )-: .....if ya'll heard curssing and banging going on, that was prolly me getting pissed off cause it beat me agiain. I'm gonna add the pics anyway but oh well..... It does still work but I just wanted a cool-neat looking parrot oh well, looks like something Fred Sanford made from the junk pile.  It'll do for now. 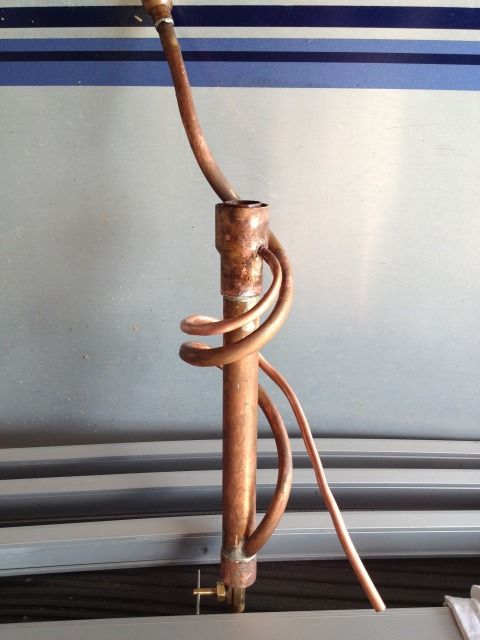 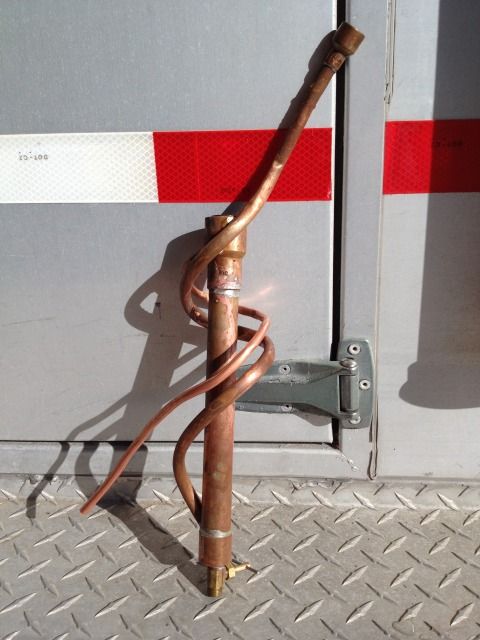 "
|
|
|
|
|
|
Rank: Senior Member Groups: Registered
Joined: 1/27/2012(UTC)
Posts: 526
|
Hey Heeler that's a very artistic concept you have there.
Have you tried filling the tube with sand and crimping the ends before bending? You need to make the tube a little longer to allow for cutting off the ends to remove the sand. I have also heard of filling with water, crimping and soldering the ends, because sometimes sand gets compacted when the tubeing is bent and becomes hard to remove. I have'nt tried the water yet but I think I will next time I bend some tubeing.
|
|
|
|
|
|
Rank: Advanced Member Groups: Registered
Joined: 12/3/2012(UTC)
Posts: 278
|
Hi Heeler,
That is a very artistic concept... I am working on mine now and I'm filling my tube with salt and I am using little plastic or rubber caps that I've had sitting in my tool box that are used for capping vacuum lines to cap the ends. also I'm using one of those spring things that you can buy for a couple bucks at the hardware store, it slips on over the tube and helps it not kink as easily. I'm just going to start out making a simple one like the ones on ebay to start with. Wish me luck.
Captinjack
|
|
|
|
|
|
Brewhaus Forum
»
General Topics
»
Our Projects
»
Simple Copper Parrot Construction
Forum Jump
You cannot post new topics in this forum.
You cannot reply to topics in this forum.
You cannot delete your posts in this forum.
You cannot edit your posts in this forum.
You cannot create polls in this forum.
You cannot vote in polls in this forum.